
My design is based on both the Grumman 2 (I liked the recessed fenders) and the New Cub. The chassis is more like the Grumman, but the shape is pure Cub.
I did the design work in Ribbonsoft's QCAD. You can download an extremely useable demo that forces you to restart every ten minutes, allowing you to save your work. Works fine on Windows 2000. Recommended.
To get the side profile, I used the Cub profile from Andrew Gibbens's profiles resource, converted to metric and scaled slightly (rounded off, if you will). Where the Cub chassis is 86& = 2184.4mm, my chassis is 2180mm, for example.
You can go read up on ellipses but all you really need to know is that your two focuses are at distance SQRT(major radius squared - minor radius squared) from the centre. So, for example, the top right hand curve of the Cub. The centre is 27" from the top, and 40" from the front (the curves have to join smoothly, in this case when both are horizontal or vertical, therefore the centre is directly under the top join and directly to the left of the front join). SQRT(40^2 - 27^2) = 29.5" which puts the two focuses at (40-29.5) = 10.5" from the front and (40+29.5) = 69.5" from the front = 50.5" from the rear. Check.
First things first, we need an axle. Teardrops are light, so Burquip's AR0550/0750 will do fine. I ordered it with B/B = 1100mm and H/H = 1480mm. Of course they got it wrong the first time, but the second axle they made for me is perfect.
The chassis is 50mm square tubing, 2 x 1480 sections, 2 x 1000 sections and 2 x 2080 sections, making a rectangle, and 2 x 1210 sections for the tongue. The friend I asked to weld all of this together added some improvisations of his own, all good.

On top of this goes the shutterply -- this is relatively inexpensive, low-grade plywood, which I also used to build walls in the house -- for example the bathroom and my cupboard.


Marking the large ellipses required a point off the board, here provided by... another board.


The wheel wells.


Fitting the sides.


Tanya testing the sleeping space for size.

As you can see, it was raining. Good thing I had a roof to work under. Here I am making the lid struts, by clamping a piece of shutterply to the side and routing it to the same curve.


Routed.

Some more cuts required.


Two...

Four.


I ended up recessing the back for a spot to put the lights, number plate, etc.

Jumping forward, this is what the hatch skeleton looks like.
So, on to skinning the thing. I used hardboard left over from shelf backing offcuts from the house.

Plenty crossmembers.


And plenty screws. These are stainless, and cost almost a rand a piece. The washer is also stainless, and also costs almost a rand a piece. I used close to a hundred screws in total.

OK, now the door. There will eventually be two doors, one on either side, but because of time constraints I made one only to start with.

I fitted the hinges before cutting out the door, so that everything would line up. Worked, too.


Aluminium T to frame the door and doorway.

Room for improvement.


Tanya likes the look of bobhenry's Lexan-roofed teardrop. Dhazard on the same site did something similar.
Maizey sells polycarbonate sheet in 3050 x 2050 sheets. Cut this down the middle (1525 x 2050) and it perfectly matches the width of my teardrop (1480 + 2 x 19 = 1518).
I was worried about the bending radius, and I took the Rand-Lover out to pick up the polycarb, but...

I could have fitted that into the Golf. Also, no worries getting it to fit the teardrop curve.

Here I am annealing the aluminium for the curve at the top of the door.


The rear lid latches are from McNaughtons. At AAD 2012 I noticed these latches are also standard fit on Reva military trucks :-)

And here we are pretty much ready to go (lexan fitted). Still raining.

Two of these are welded to the chassis at the back to provide stability. Essential.

Oops, we need lights!
In South Africa we wire trailers to SABS 1327 - 1981. The guys over on the Overland site have a pdf.


And a spare wheel! (Back under the roof because... it started raining again.)

We leave tomorrow. Early. Yes, there's a lot of cabinetry still in the making, but let's do a shakedown cruize first. Just out to Etosha and back, it's only 4200km...


Saw this teardrop for hire in PE.
Blog post about fixing the roof and the galley. Here's a copy (Also try the Teardrop category for blog posts I might forget to mention here).
[...] I never completed the galley and inside cupboards*.

I decided to shorten the see-through part of the roof, taking it from the front to the top, not over towards the back. I'll have to drill bigger holes through the lexan to allow it to float, and use weatherstripping rather than trying to glue it down.
Here I am using my l33t template skilz so that I can cut two pieces of ply to the right shape.

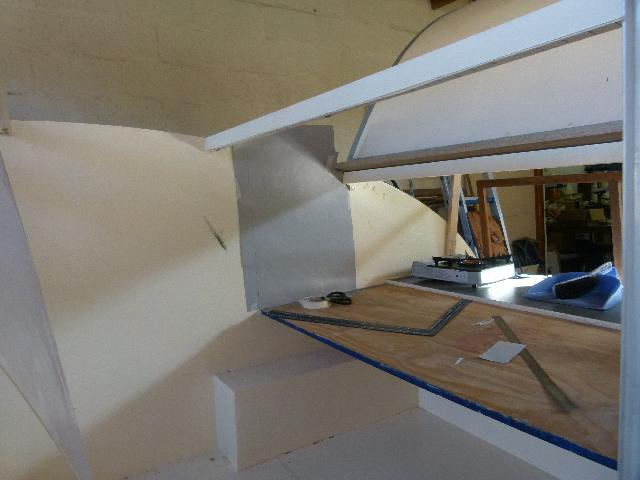
Puzzling about the layout. No, three drawers won't fit.

(And a lot of cutting and screwing later) -- Looking good.
So I've been procrastinating with the second door. It's a major PITA. But it had to be done so...

As with the first door, I first bolted the hinges to the panel and then cut the door out. I tried to transfer the dimensions from the other side as accurately as possible.

Trimmed the hole with the same aluminium T section, and then ran into a problem. Because when I went to buy more aluminium, they were no longer there. And I couldn't find the same thing anywhere else. Found something similar at the fourth place I looked, it just had to do.
So the trim on the second door is kind of iffy.

Gotta have a bookshelf. And books.

Let's go!