May 2008

Looking better

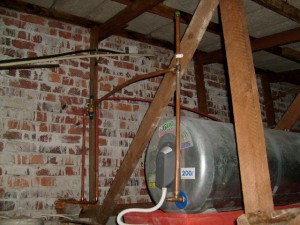
So the geyser (inside) plumbing is pretty much done. I finally found 90 degree 22mm solder bends at Mica in Diep River. Also bought a Ryobi belt sander for R800. The Bosch is far nicer, but also double the price.

I then went on to Builders Warehouse, their saving grace is that they’re open ’till 1900. Bought a 20L tin of primer (almost R800) and a double handful of 22mm brass compression fittings (R500). With a bit of filler here, a piece of copper pipe there, and so forth, this brings my day’s expenses to R3000. Fun.

So this morning the geyser got itself plumbed, bled, etc. Now for the outside work, which will be compression fittings and polycop pipe.

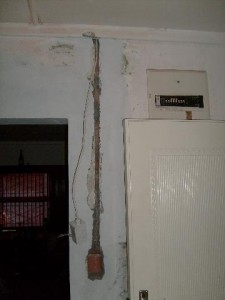
Frank’s also been busy. OK, so the picture on the right falls under “one step forward, two steps back” — the box was in the wall when I realised that I needed a second wire, because I’m running the main light off 220V and the downlights off 12V, and separate switches is the way to go.

And this was the view coming down Ou Kaapse Weg this morning. This shot taken on my mik&druk out the car window, it was a lot more impressive in real life, lemmetellya.

Cape Town. Gotta love the place.

Progress Report

No great strides, but I made a little progress here and there.
Before After

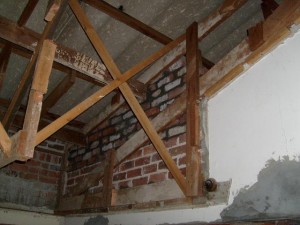
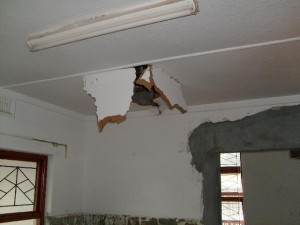
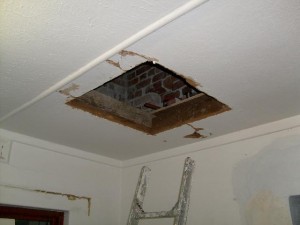
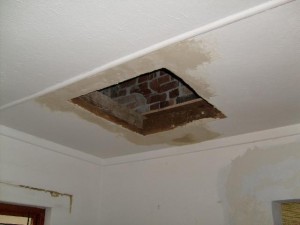
After looks better than before, no? I’ve been meaning to relocate the existing hatch in the hallway, since I want to build a cupboard which would limit access to it. Wasn’t planning on having it in the kitchen, but then Frank slipped up (or down, in this case) and I decided to make the best of the situation. I added a crossmember and a few battons, and took a UPS pallet apart for the plywood which I used to build a platform I can sit on while getting into / out of the roof.

A bit of cretestone and paint and it’ll look OK (and the small hole on the wall side will be above a built-in cupboard, so no worries there.

OK, that’s the one step forward.

I originally thought to hang the new geyser on the outside wall, and started cutting the pipes leading to the old geyser in preparation. Then I bought a 200 liter geyser, and then I realised that 200 liter geysers can’t be wall-hung. And the pipes are of the old style, where the 22mm type is slightly smaller than the new stuff, which means that the solder fittings don’t. Fit, that is. So my attempts at rejoining the pipe were futile.

So I gave up, told Frank to knock another hole in the wall for the water to the geyser.

Now I need a hand full of 22mm 90 degree solder type bends to complete the work. I used two 45 degree bends on the hot side — nobody seems to have 90 degree 22mm bends (I can get plenty 15mm and even 28mm).

And then the outside plumbing starts. Rough estimate — For now I need six 22mm Ts, 4 reducing Ts, 4 22mm bends, 4 reducing bends, more pipe… this is another thousand rands’ worth of stuff, because I’m using poly pipe, so I need compression fittings. Doing it the other way ’round is worse — the fittings are much cheaper, but the pipe clocks in at something like R35/m for the thin walled (less expensive, but doesn’t bend) stuff. This is for the kids’ side of the house only, I still have to figure out where and how the pipes are going to run on our side.

And we bought paint, sticking to standard colours as advised by the chappie at Builder’s Warehouse. He advised us to use a roof paint (Bristol Acrylic Roof Paint) for the fascias, and on-special Dulux Weatherguard for the walls. Tanya picked cream (“Flamenco”) for the walls and red-ish brown (“Burgundy Red”) for the fascias. Bought two x 20l of the Dulux, will probably need that much again.
Alice and the Red Queen

“Now, here, you see, it takes all the running you can do, to keep in the same place.” — Red Queen.

I’m spending about 2, 2 1/2 hours each morning doing (at the moment) the plumbing and electricity. Meanwhile Frank is running out of work to do, he has to tile the bathroom walls, but not before I’ve plumbed the bath mixer tap in and checked for leaks. He has to patch up the wall in the kitchen, but not before I’ve wired up the light switch boxes. And it seems to me that he works more slowly the less work he has, to make sure of his continued employment. Understandable, of course. But that means that I’m the handbrake on the works.

I told him that next week he’s starting to paint the outside of the house. That will keep him busy, giving me time to catch up with the plumbing.

Unless it rains, of course.

The previous owners added the triple garage, and a wondrous thing it is, but they never painted the cement blocks, so that’s where Frank will start. On the shopping list : 20 liters of plaster primer and two rollers & trays.

Meanwhile Tanya is choosing the colours — she doesn’t like the current green & white scheme. Me? I’m a guy. Red, green and blue are colours, Mauve, Lilac and Magenta are characters from the Rocky Horror Picture Show. (OK, I might be mistaken about Mauve and Lilac).

Lights

How much light does one need in, for example, a kitchen? The answer is “lots” but if you’re the main contractor that doesn’t help much :-)

I found http://www.lightingplans.com/lightPlansDesign102.html which tells me that a kitchen needs 1 to 1.5 watts of CFL per square foot, which translates to about ten times that per square meter. (work-in-progress warning) The kitchen is 10.5 square meters total, of which around 6 meters is floor space. Call it 90 – 150 watts total. Looks like four to six downlights loaded with 13 watt CFL bulbs for task illumination, coupled with a central light for general illuminiation, will do. Along with that I’ll use some kind of undercounter lights, probably LED technology from LEDzShine. There’s no sense having a gas stove but still having to cook by candle light when Eskom does it’s inevitable thing — I’m planning to run the 12V lights off a battery charged by the mains, sort of a lighting UPS.

On the living room side of things, we have no idea what we want to do. I installed four light points in the ceiling, dividing the length and the width roughly into thirds. It’ll have to do.

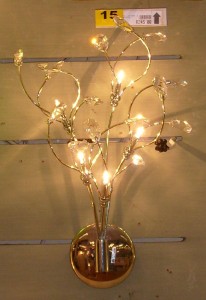
We also bought (see “We’re Not There Yet” on Tanya’s blog :-) two chandeliers for the kids — a purple glassy thing for Tamsyn and a black gothy thing for Jessica. R599 and R699 from Mr Price Home.

Tanya saw this one at Builder’s Warehouse. For “our” bathroom. Expensive… but nice.

Chaos

I feel that things should be coming together around now. Instead, it feels as if the chaos is taking over, like in The Never Ending Story. We’re still busy chasing pipes into walls, making holes for plumbing, and so on — I think mostly because of lack of planning on my part — I’ve not been able to visualise the process properly, to make sure that things get done in order.

OK, some of this is due to plans changing on-the-fly, but still.

On the upside, Colin helped me out with the kitchen layout over the weekend. We sort-of decided that the counter tops can’t be postform, mainly because of the 400mm prep counter with the 600mm bump over the dishwasher, a constuct like that has to be something expensive like granite or Corian or something simple like Formica with wood edging. Provisional choice is cherry.

The ceiling in the living room is in, being cretestoned and corniced today. That at least counts for progress.

Floors and flooring

Some decisions are easy. Kitchen, bathroom : tile. Tamsyn’s room, can’t be carpet (asthma) : tile or lino or wood. Other decisions are more difficult. Living room : carpet or tile? Tile is great when it comes to cleaning up red wine spills, but it’s hard and makes a room “ring” very easily. Carpet is quieter.

When we pulled up the existing carpets we found quite nice wooden floors in all three bedrooms. That makes it easy, sand down the wooden floors for Tanya’s activity room (the old small bedroom) and Tamsyn’s room. Carpet Jessica’s room and the space outside the bedrooms / bathroom.

The living room floor is half wood and half slasto (slate stone / leiklip). You can’t tile over a wooden floor. So carpet it is. But you shouldn’t carpet straight over slasto, although the previous owners did. The slasto is uneven, and the carpet will wear on the high spots (thanks Mike). A levelling screed is required. One that can be worked to a feather edge.

So then the question : bring the kitchen tiles out into the dining area / foyer, or bring the living room carpet out into the foyer / dining area? I’m going with the tile idea for now. (Edit : the dining room floor is also slasto).

(And in case you’re wondering the old activity room / new master bedroom has a nice wooden floor which we’re not doing anything to).

Anyway, we bought some tiles from CTM this weekend.

2 square meters ASA2010A San Marco Grey @ R45.90/square : Tamsyn’s bathroom floor.

14 square meters CCL20B1A Cleo Grey @ 59.90/square : Tamsyn’s bathroom walls.

32 Orchid Grey Listello border tiles @ 24.90/each (!) : Tamsyn’s bathroom wall border.

3 Orchid Grey Spotter @ 90.90/each (!!!!!) : Tamsyn’s bathroom wall.

I really should leave Tanya at home when it comes to buying tiles.

10 square meters LC680 Bahamas Beige @ 64.90/square : Kitchen floor.

4 Tunis Corner (110×110 inset tiles) @ 29.90/each : Kitchen floor.

If we tile the dining area etc I’d probably need another 13 squares of the Bahamas Beige.

Edit : Bought another 14 squares Bahamas Beige.

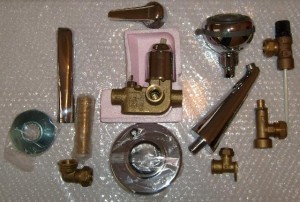
Bling! Plum-bling!

Brass is the new gold. Chrome plating is the new platinum.

This is R1400 worth of plum-bling. And it’s the cheap stuff, mind.

*sigh*

On stove extractor hoods

We never had extractor hoods in our kitchens (OK, I lie, there was one fitted at 15th Avenue, one of the recirculating ones, we didn’t use it much). But when one looks at showrooms or kitchen magazines, it seems an essential piece of kit.

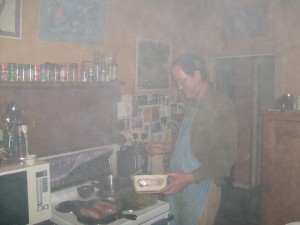
I’ve been slowly convincing myself that we don’t need one (it’s not the cost, so much (R2000 for the Pierre Roblin Rubis 70) but the space that it takes up) but then Pieter cooked baby marrows followed by steaks in his griddle pan last night.

Proof that extractor hoods could be useful.

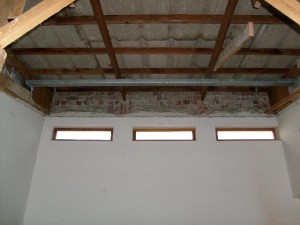
Raise High the Roof Beam, Carpenters

A whole lot of work…

… to gain about half a meter of headroom at the bottom and maybe 300mm at the top.

Oh, and I couldn’t fit both the Libra Misty bath with glass and front panel and the Libra Neptune Euro in the Rand-Lover, so the Neptune’s still at Exquisite Bathrooms. Some other day.

And unless we can find a very good match for the kitchen floor tiles this weekend (we need to replace two tiles) we’ll need to strip & replace the whole lot. Now tiles are, or can be, relatively inexpensive. R50 or R60 per square meter. Having them laid, however, easily doubles this. On the third hand, I have a remarkably versatile chappy working for me, and I suspect he’d be able to lay tile at a rate of knots if properly instructed.

Update, 2008-05-12 : We bought 10 square meters of “LC680 Bahamas Beige 408×408” from CTM at R64.90 per square. Of course the little 110×110 inset (pattern) tiles at R29.90 each pushed up the price quite a lot.

Dreaded Previous Owner

I came across the term “DPO” when I joined the Land Rover Owners mailing list — this is the guy you bought the vehicle from, who sealed an oil leak with bubblegum or put banana peels in the gearbox to hide the whine or rewired the entire vehicle using only one colour wire — you get the idea.

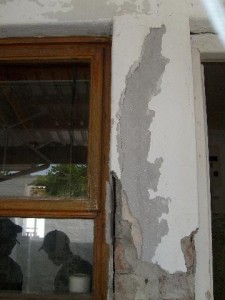
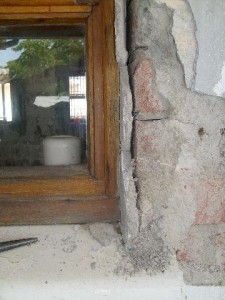
Turns out that houses have DPOs too. This crumbling plasterwork by the [1] kitchen window courtesy of not removing all of the iron framed window when replacing it with a nice new wooden one. The iron rusted, pushed the plaster out, and plastering over it just didn’t work (go figure).

Our “fix” might lead to the next owner of the house future-blog-equivalent-ing about it in much the same way. (We removed as much of the rust as we could, then stuffed the cavity with white shipping foam, then plastered over it, the idea being that future rust expansion would compress the foam and not lift the plaster).

[1] My brother objects to my use of “<over there> by the <something>”. Doesn’t stop me from (ab)using the term.

Because why, I can.