House

I’m starting to think that this might have been a bad idea…

The kitchen in kit form, that is.

Good news is I found the shelves for the microwave unit, the ones I thought were missing. I also figured out how the drawers are supposed to be assembled.

Bad news is, they supplied the units that go in front of the kitchen window at the standard 720mm height (for a 900mm counter) instead of 820mm. The doors and panels are right, though. (Edit : the panels next to the dishwasher are 100mm to short too).

More bad news is, they didn’t supply the units that go under the sink, at all. They did supply the doors though.

And while they supplied the correct number (24) of doors, one is the wrong size.

And the corner cupboard front edge is not edged (covered in melamine) but I’m apparently supposed to do that myself. Met mamma se strykyster. Ek gaan gemoer raak, ek voel dit in my water. Not that they supplied the edging, nooooo, I had to go ask.

Edit : and there’s a 200mm wide unit that I’m pretty sure I didn’t get either, will double check tonight.

Took me quite a few hours of cataloguing to learn the above. Fortunately I got Julian to provide me with a full list of the doors and panels, and I made notes as to which doors and panels go where.

Tip : get them to pack each unit separately. It might cost more, but the time saved should be worth it (I still have a few drilled pieces that I have no idea where they’re supposed to go).

It feels like Christmas

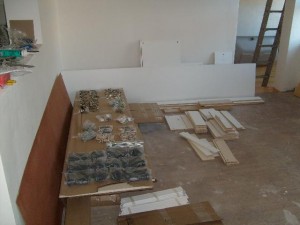
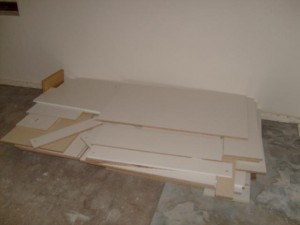
So I have a supposedly complete set of kitchen cabinets, in flat format. And I have to make sense of it (they included some very sketchy drawings for some of the stuff but not for all).

So I started sorting out things, putting pieces of the same unit together, as far as I can tell. Now, if I had a complete set of everything, I could figure it out, but nooo. Firstly, I’m supposed to have two 300 deep wall units, for over the stove. Turns out I have four. The one extra might be intended to go above the fridge, but I took that out of the design, the other extra is a duplicate of the one over the stove. I guess if I want to stuff something up, that’s where I need to start.

Julian at Lansdowne Boards assures me I didn’t pay for the extra stuff, hy voel ‘n veer.

On the other hand, I’m supposed to have four fixed shelves for the microwave unit, and I only have two.

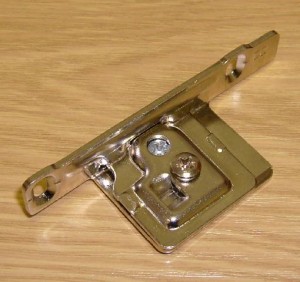
I also have no idea what this is, but Julian phone-IDed it as part of the drawer assembly, I will have to go there to have a look at where and how it goes.

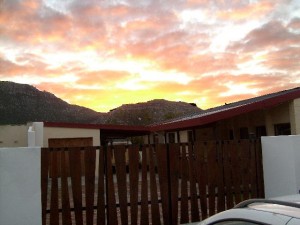
Sunrise yesterday morning, slightly gippoed (original).

Oh, and why does it feel like Christmas? ‘cos the kids get toys which have to be assembled by Yours Truly, that’s why. Except the toys come with rudimentary instructions…

Doing our bit to save the environment.

South Africa is quite a dry country. Hard to believe after the storms that recently hit Cape Town, but our average rainfall is 500mm/year, while the world average is 860mm.

The light blue area in the map is desert. Namaqualand, Richtersveld, Karoo… stunning landscape, but dry.

We are also in the middle of an energy crisis. It seems that our electricity utility and / or government decided that the minimum of maintenance was all that was required to bring the country into the 21st century, so no new power stations were built while the economy and the population boomed.

The greenies suggest hydro-electric, wind and solar power, because they don’t like nuclear. Nothing wrong with hydro-electricity, if you don’t mind pouring your drinking water into the sea (the power you can extract from the water is a function of the mass and the difference in height, so to extract the maximum power the water needs to end up at sea level).

Wind and solar farms don’t seem to work well anywhere in the world, but it does work well on a local, distributed level — especially solar, in the form of solar geysers. Although, with our current low (even after rates increased) cost of electricity, it takes at least five years to break even on the installation cost. Unless you do-it-yourself, which I am planning on doing (Backwoods Home Magazine has some good articles, tips and ideas).

Out-of-the-box way of going solar : hang your clothes on the line instead of using a tumble drier.

Looking at the future, I see three crunches approaching. Two are related — fuel and electricity. With nuclear power stations we can manage the electricity supply, but fuel shortages will force us to change the way we live.

The third crunch is water. We already have periodic shortages, maybe coupled to the 11 year Solar Cycle. With population increasing, we’re going to have to take a serious look at how we use water.

Studies say that 3/4 of the water we use is in the bathroom, with your toilet(s) alone accounting for nearly 1/3. The toilet we’re fitting in the new bathroom is a dual flush unit. These use a lot less water than the traditional toilets, firstly because of a more efficient design (a full flush takes 5 or 6 litres, while the traditional toilets use closer to 18 litres, they tell me — and sticking a brick in the tank does reduce the amount of water per flush, but because the toilet was not designed for it, it also leads to incomplete flushes, so you flush twice, using even more water), and secondly because you can select a “half flush” if there are no floaty bits that need flushing.

Out-of-the-box way of saving water in the bathroom : if you’re a guy, go outside. This not only saves half a flush of water, it also helps water your plants — two savings for the price of one. Oh, and it might even help keeping porcupines away.

Wiring the master bathroom

So after finishing (most of) the plumbing, I turned to wiring the new bathroom (unlike the plumbing, fortunately, only the kitchen and the new master bedroom / bathroom needs extra wiring).

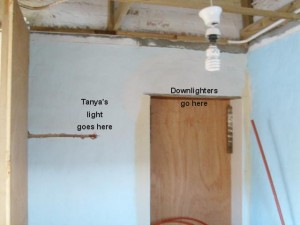
Now in the bathroom we have an alcove where the doorway used to be. We’ll have some glass shelves there, and downlighters. We also have Tanya’s crystal light, which doesn’t really give much light, more like mood lighting with candles and with the main light off.

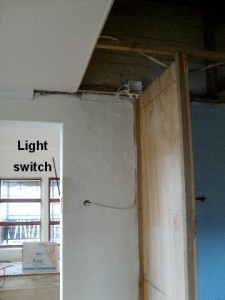
The main light, of course, needs to be controlled from outside the bathroom. But it would be nice to turn the main light off and the mood lighting on from inside.

My solution is to fit a two way circuit for the main lights, with one switch outside (by the doorway into the MBR) and the other switch next to the door to the outside world. The switch for Tanya’s light then goes next to the door as well. And the downlighters go on the same circuit as the main lights.

OK, all of this sounds terribly confusing, and the wiring is also rather… complicated. Especially since the best way to hide the wire for the downlighters is to take it from the switch up into the ceiling, around to the other switch, then down, under the bath, and up the height of the old doorway… yes, this is the easy way… trust me.

Stupid, stupid, stupid

Me, that is.

I didn’t think, see.

If I’d measured things and told Frank to build the brick wall one brick lower, he would have been able to fit another row of glass bricks in the top.

As it is I’m left with a gap that I now need to fill.

Bugger.

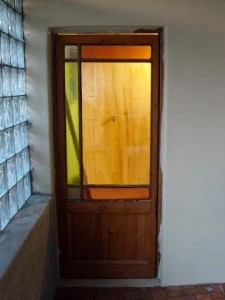
The door is from Cape Ads. It’s a bit small for the frame, actually it’s half of a double door. I’ll have to fit filler strips to the side and top.

Win a few, lose a few.

Tanya’s colour scheme looks good :-)

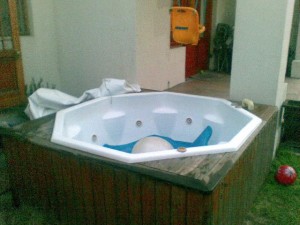
I’ve been scanning the Cape Ads for a jacuzzi for a while. Found one for what I thought to be a rather reasonable price, R 7500 for a freestanding unit. It’s a Superior Spa Barracuda, and it’s currently living on a trailer in the driveway — getting it there was fun too. You see, we have a flatbed trailer in the family, but it wasn’t roadworthy, since they recently made reflective strips down the side of the trailer mandatory — not a bad idea IMO. But that meant I first had to get two strips of galvanised steel which I could poprivit to the side of the trailer so that I could stick the tape to it. OK, there’s a place down the road which sells all kinds of steel, R30 later, we’re done. Cheap, compared to the cost of the tape.

So on Saturday I drove through to Bellville, fitted the steel strips and reflective tape while my father watched the Bokke klup the All Blacks, and dragged the trailer to Kenilworth. By now I’d realised that I was running late, so instead of going through to Fish Hoek to pick up the guys, I asked Tanya to bring them through. Loaded the jacuzzi on the trailer with much grunting and groaning, and strapped it down. Drove back rather slowly (there are three routes, over Ou Kaapse Weg (steep, especially the uphill bit), over Boyes Drive (also somewhat steep, specifically the downhill bit, and Muizenberg Main Road (where they have roadworks and a stop & go system). We went via Muizenberg. Lesser of three evils.
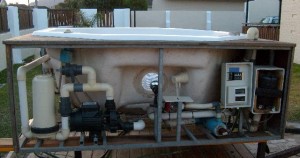
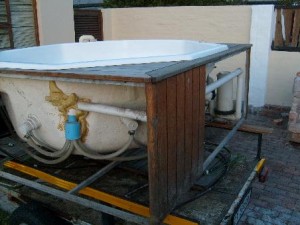
So, for geeks like me — the anatomy of a jacuzzi. (Non-geeks, skip down).

The main pump is the black thing left of centre (left hand pic). It draws water from underneath, pumps it through the canister filter (far left) and then around to the manifold (picture on right) where the water gets split five ways to the five main jets. The main jets also have an air hose each, air feed being controlled by the valve on the jacuzzi rim (top left on left hand pic).

On the bottom right hand side of the first pic, there’s a blue canister. That contains the heater element. Water is again drawn from the bottom, though the heater via the small pump (just right of centre) and into the jet behind it.

So basically the water in the jacuzzi is circulated via the main jets, and the heater circuit is on the side.

The third “pump” is the black thing on the right hand side, it pumps air via an airlock (the U above the deck — to make sure it doesn’t get flooded) and into the bottom of the jacuzzi.

This thing needs a serious power supply. It has four trip switches, 10 and 15 amp for the pumps, and 30A for the heater. Now I have a “spare” (used to be the stove) 20A 3 phase circuit, and the question is whether this would be sufficient — the heater is advertised as 4kW, which is 18A or so, so I don’t know why they needed a 30A trip. Current (*cough*) planning : use one 20A circuit for the heater, use another for the rest, and use the third for the oven — basically replacing a four plate stove with a jacuzzi, electrically speaking.

^^^ Non-geeks : you can skip to here.
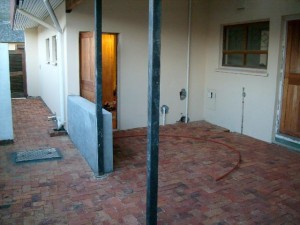
The jacuzzi’s going into the corner there. Lekker.

OK, so I mentioned “lose a few” in the topic. Went down to Muizenberg for my weekly brass fix, R72’s worth this time. Almost there. I also bought 6m of 15mm polycop. Only slightly cheaper than the hardware store, R3.50 as opposed to around R4/m. And the bloody stuff is out of spec. Too thick by just enough to make it almost impossible to fit the little ring of the compression fitting. Bugger.

Back to geek : I also bought a 1gig USB memory stick for R80, which is a good price, I think. But it only works in two of the four slots on my D815EEA2 motherboard, gives errors in the other two. No idea why, but the slots are connected to different USB controllers, according to the mostly useless mobo manual. The memstick works just great with my xcarlink, which is what I got it for, so it’s not all bad.

And BTW the xcarlink *rawks*.
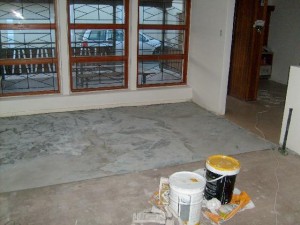
Frank screeded the slasto, using a bag and a half of self levelling screed, mixed with some Bond-It for extra strength. I figured that he should have been able to do the job with one bag, I think the screeding should have been thinner. But it’ll do.
Broke 100k

This morning I had R500 to go to hit the R100 000 mark, so I went out and spent R4 000.

It’s officially cheaper to shoot someone than to throw a brick at them. As long as you load your own ammo. R1.50 a common garden ROK brick? Yoiks.

Glass bricks

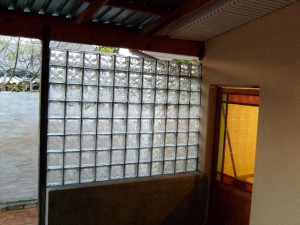
So, Frank built a 900mm high wall closing off about a third of the back stoep, the idea is to build a glass block wall all the way to the top. This will shelter the jacuzzi-corner from the Fish Hoek wind, which blows up the valley from the sea and gives me a permanent runny nose.

But Frank doesn’t know how to build with glass blocks.

Neither do I.

Homebase makes it look complex, DIY Divas makes it look easy. Fine Homebuilding says it’s somewhere in between. With those three references, I’m sure we’ll get it right. I’ll ask some questions at the hardware store tomorrow morning.

Edit : Frank ended up building the glass wall just like a normal brick wall, using 5mm tile spacers, and normal cement. He strung wire between the wall and the steel pole (self tappers on the steel side, nail-in anchors into the wall) every two courses, and it came out well. Well, sorta well, see later post on same subject.

Progress update

Problem with writing a blog is that once people know about it, they start nagging if it’s not updated regularly (yes, I’m looking at you, CH). But Mondays are hectic, and so’s the end of the month, and yesterday happened to be both.

This freestanding jacuzzi was advertised in last Thursday’s Cape Ads. It’s just around the corner from where I work, and the price is good (R7500), but I have no idea how I’m going to get it on a trailer. Plans Will Have To Be Made. But the current owner first needs to get an electrician in to disconnect the thing first.

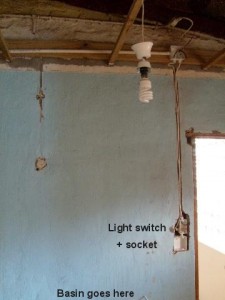
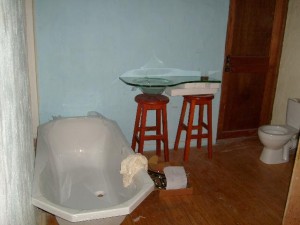
One piece of shutterboard, four blocks of wood, a few screws and a bit of cretestone, and the original doorway is no more. Doing it this way allows me to build a shelf on the other side, behind where the bath is going (you can see it on the left in the second photograph, which is basically our bathroom as it looked last Thursday — they’ve since knocked a few holes in the blue wall for the plumbing).

I had to go back to the place I bought the glass basin from, because I could not figure out how to use the supplied fasteners to fix the thing to the wall. Included in the baggie were two chemical fasteners with capscrews and washers, which must be intended for the two wall brackets. But the two chrome caps don’t fit over the capscrews. Turns out the guys who installed the demo unit had the same problem, because they ended up using fasteners which are not in the kit at all. So sometimes the suppliers of these things don’t know best. I’m planning to ditch the lot and use either rawlbolts or sommer drill a hole all the way through the wall with a piece of threaded rod and acorn nuts.

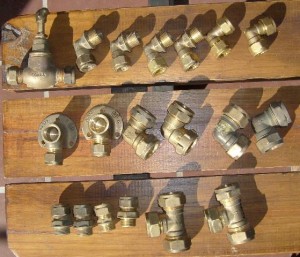
Hopefully the last brass purchase. R250 at Muizenberg market. I also bought 15m of 22mm polycop for R5 a meter — the guys estimated the length, I saw I was getting a good deal, didn’t ask for change from R80 — turned out to be 17 1/2m in total.

I also had to buy two more mixer taps, one for the bath and one for the shower. Both with diverters, since Tanya wants a hand shower by the bath. and we’re planning to fit two showerheads in the shower, depending on whether you want to wash your hair or not. On the 8th of May I paid R564+VAT for a mixer tap. On the 27th of June (7 weeks later) I paid R780+VAT for the identical tap from the same place. This is a 38% increase! The mind boggles.

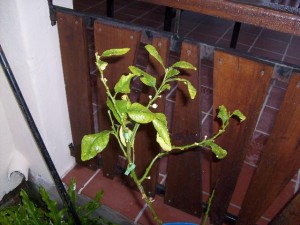
Looks like our lime tree is doing well — new flowers. One can but hope.

This was the view driving to work from Bellville side this morning. I had to stop, take a picture, and share.

Sometimes I think I’m too lazy…

In this specific instance, too lazy to deal with finding and hiring a professional tiler, so I’m getting Frank to do the tiling. Which means that I have to tell him exactly what to do. Which means more work and stress for me, not less.

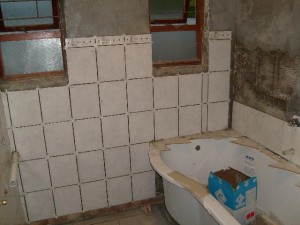
In order to not cut the tiles next to the window on the right, Frank inserted the thin strip of tiles in the middle. He’s good at thinking outside the box like this sometimes, but I don’t like it. So he’s re-doing it my way.

On the other hand, we had a “professional” tiler at Amperbo. And he didn’t do the job right, in my opinion, either.

And Frank listens to what I tell him to do, whereas the professional dude might not.

See? I can justify anything :-)

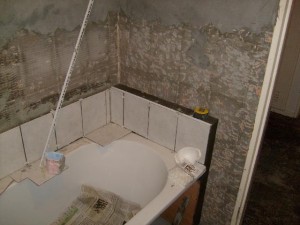
The wooden box I built behind the bath, shimmed to be exactly one tile high. This determined the level all the way through — in other words, Frank had to start two tiles lower on the wall in the first picture, making sure that he lined up with the top of the bath to bring the line through onto this box. I think figuring this out took him a whole day.

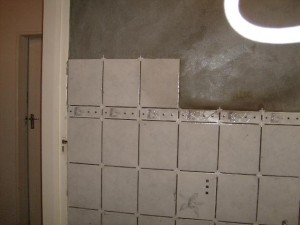
Tanya and I marked three places where we wanted the spotter tiles. This is not one of them. But it works.

Frank broke the first spotter he tried to fit into this position, so I went off to buy two more spotters this morning, one to replace the broken one and one to replace this one, which will stay. R90 each. !.